
To log in or register:
1. Please go to https://www.woodland.lightsonsites.com/
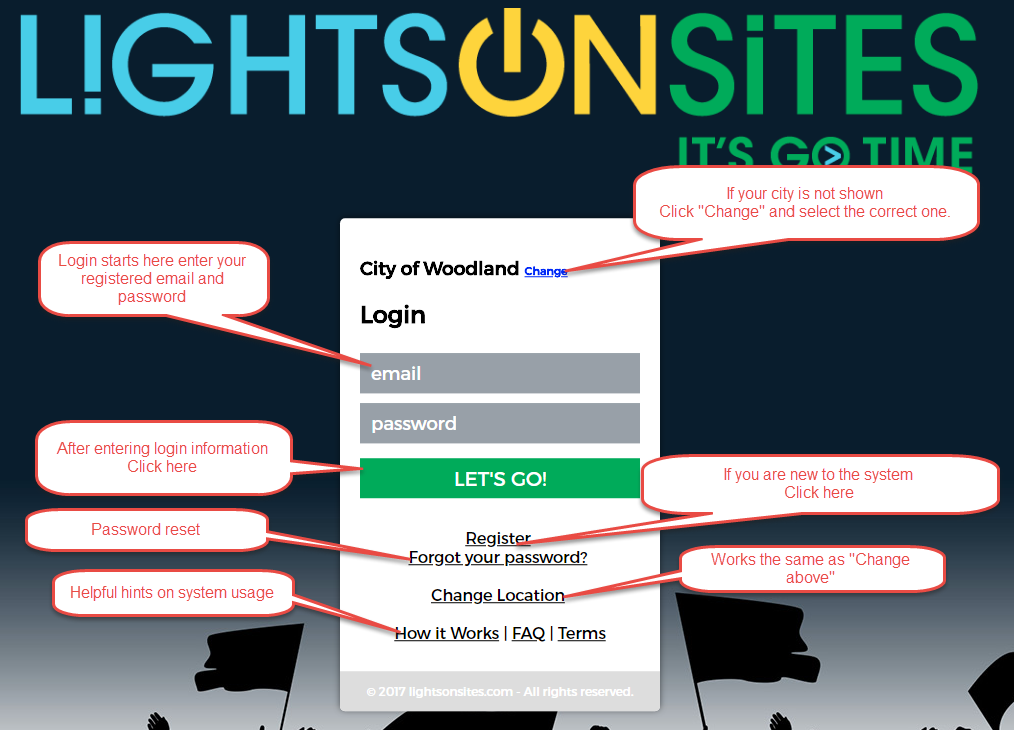
2. Below is a brief description and graphic of our login screen.
- Make sure you are on the correct city. At the top of the page it should have this listed "https://woodland.lightsonsites.com/"
- To login just enter your email address and a password, then click "Let's GO!".
- To create an account just click on "Register". You will then need to enter your email address, a password, username and select "Submit" at the bottom of the page.
3. If you already have an account, please enter your email address and password, click "Let's Go!"
- Below is a description of the Login page.
- To login just enter your email address and a password, then click "Let's GO!".
- To create an account just click on "Register". You will then need to enter your email address, a password, username and select "Submit" at the bottom of the page.
- As base login you will have the ability to control only "public" fields. All other assignments are by invitation.
3. If you already have an account, please enter your email address and password, click "Let's Go!"
After Logging in and being assigned as an Admin for an organization:
You will see tiles associated with you. As an admin for a group will see at least three tiles. You will see your individual tile, your group user's tile and the admin tile. Below is an example of how the screen shows up on a computer. The next image is the same screen on a smaller screen.
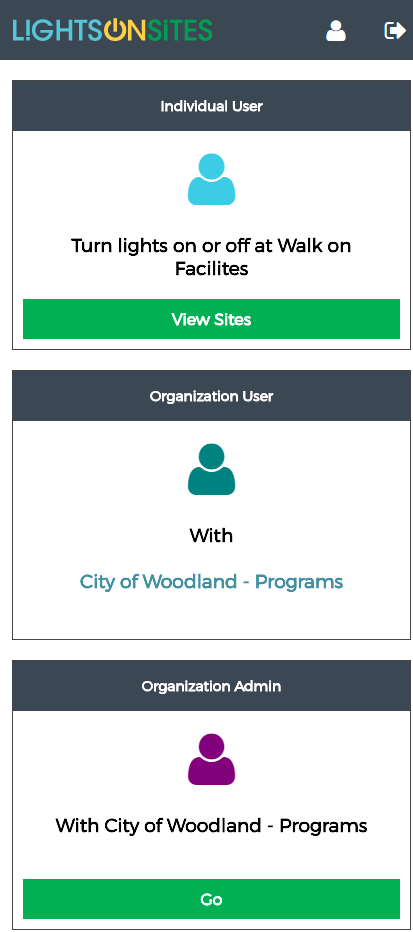
To log out just click on the arrow on top left part of your screen.
If you would like to change your password just click on your name or int he case of the smaller screen the little torso icon at the top right of the screen.You can edit your personal profile by clicking on your user profile. Don't enter the credit card as the City of Woodland is not collecting for the usages over this app at this time.

Entering data into the Organization.
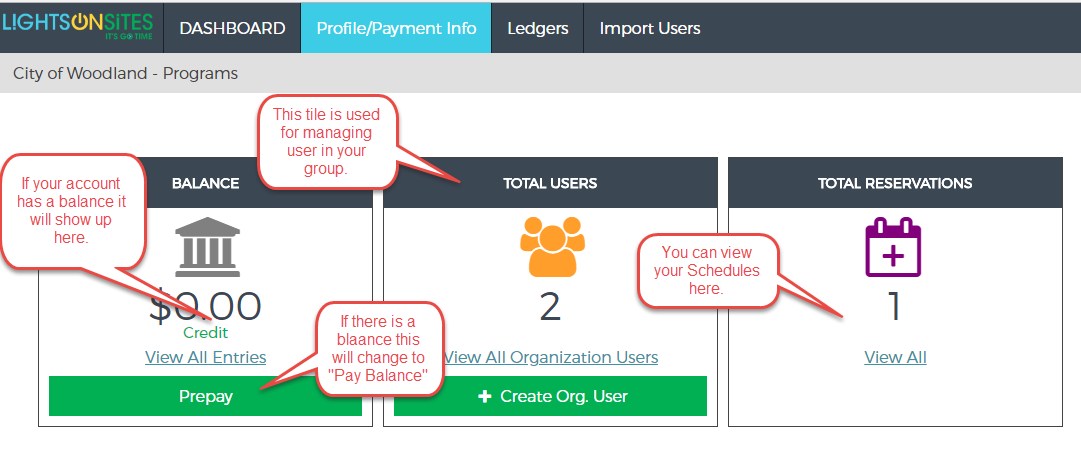
Once you have logged in and selected the "Admin Tile" you will have many options to choose.
Add or delete users to your organization or view and control reservations.
To add uses
Click on the "Create Org User"
Then you can either add a new person to the system as an organization user or select an existing user by entering in their email address.
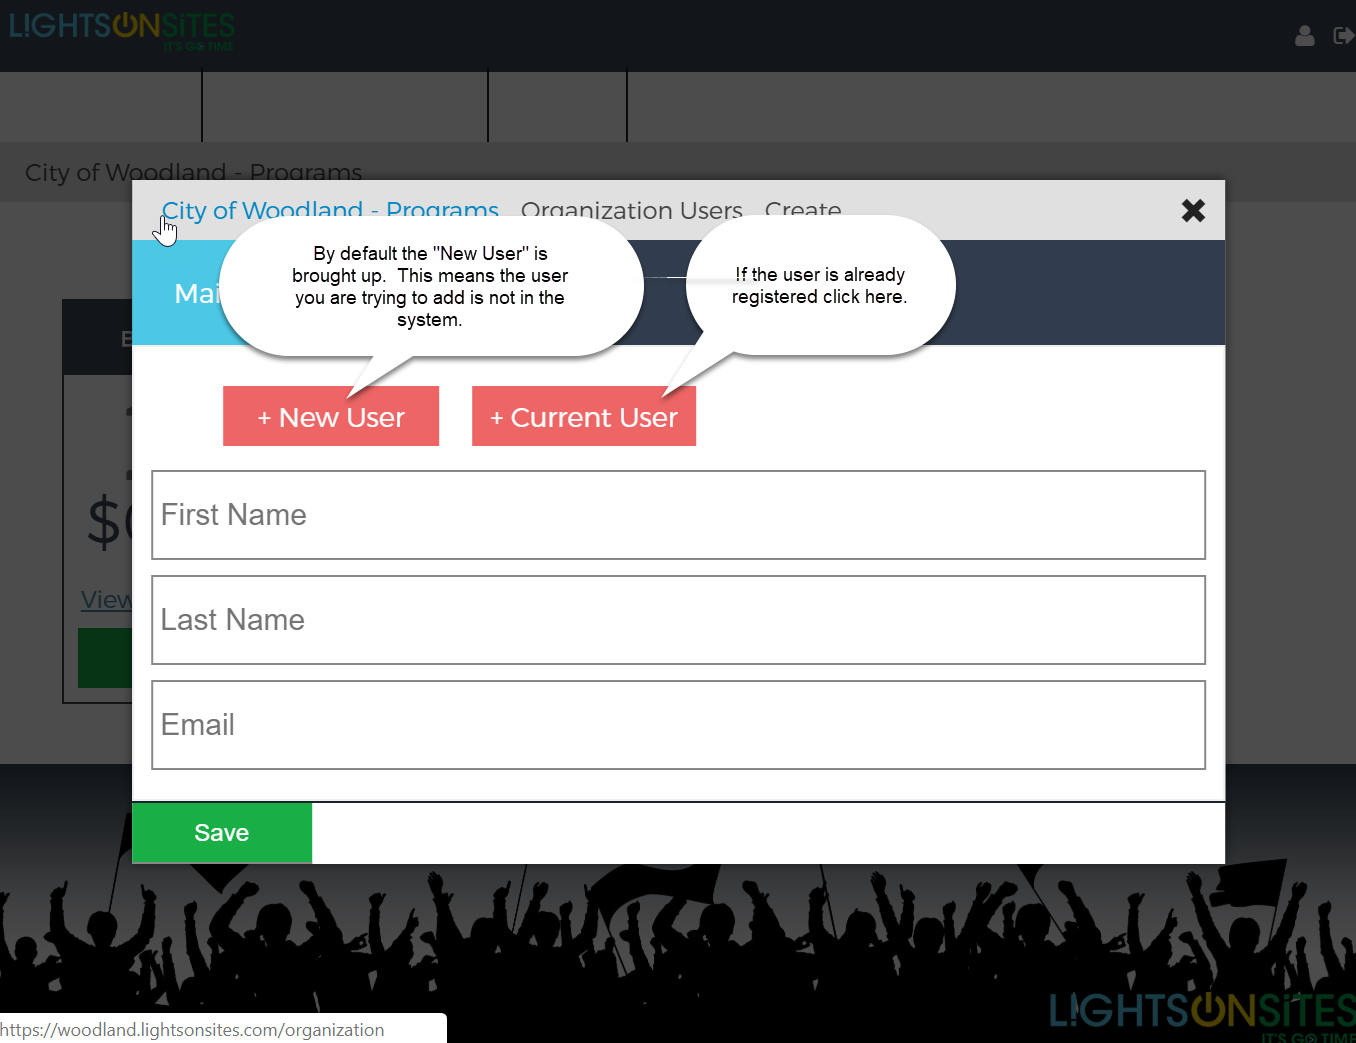
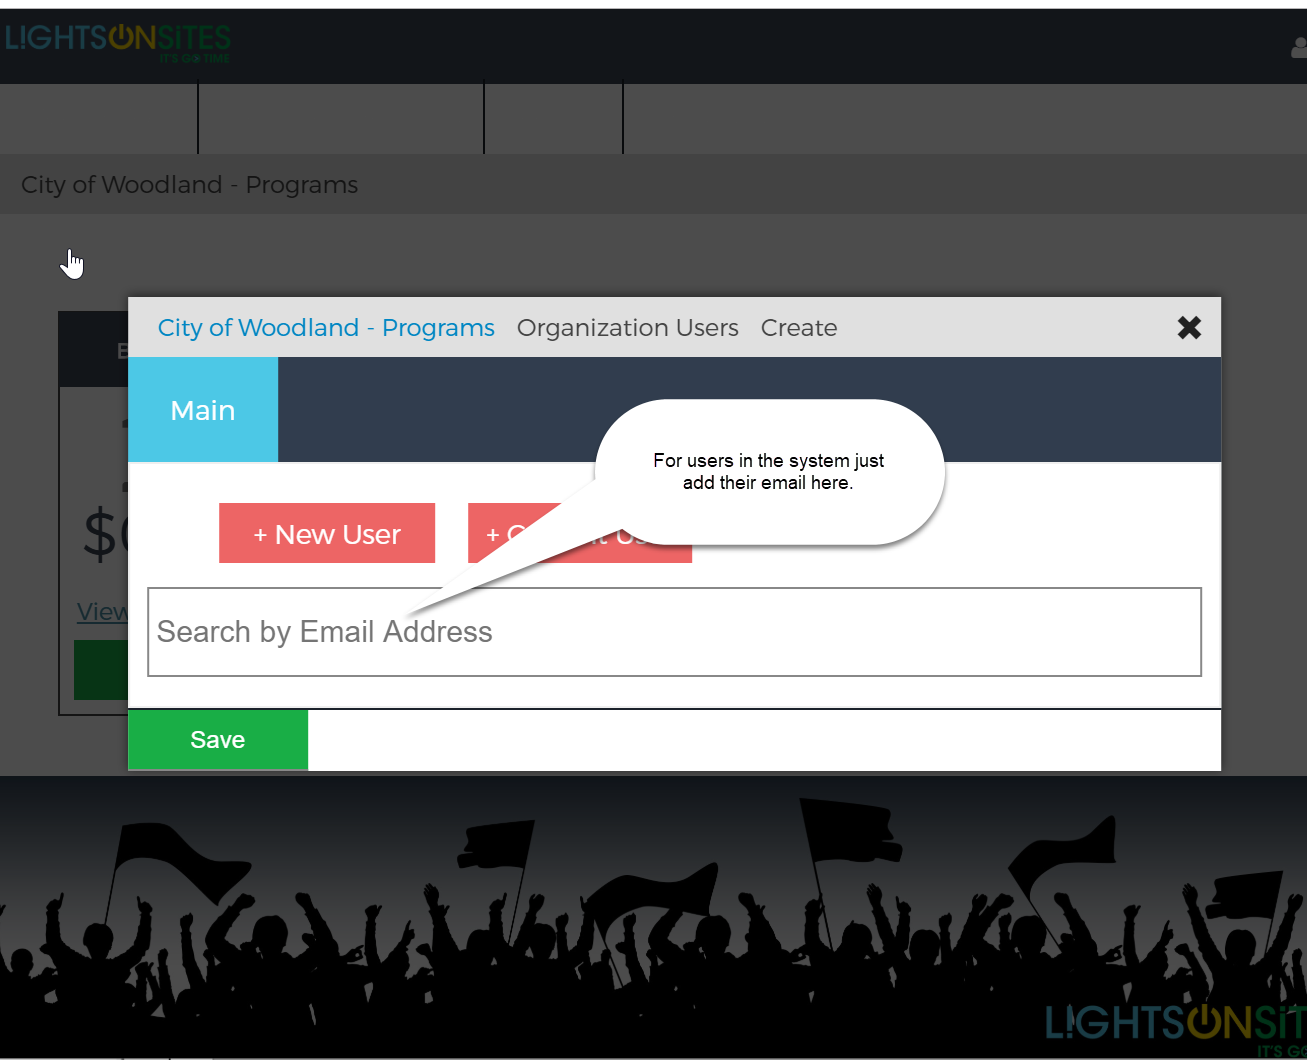
After adding the person they will get an email stating you added them. If there are in the system the "Organization User" tile will appear. If they are new they will have to create a user password before getting into the system.
Controlling lights from admin screen:
From the admin screen click on (View All) from the "Total Reservations" tile. Click on the Status of the field you would like to control. IF the field is off you can turn it on if the field is on you can turn it off. In all cases the system log who turn on and off the lights.
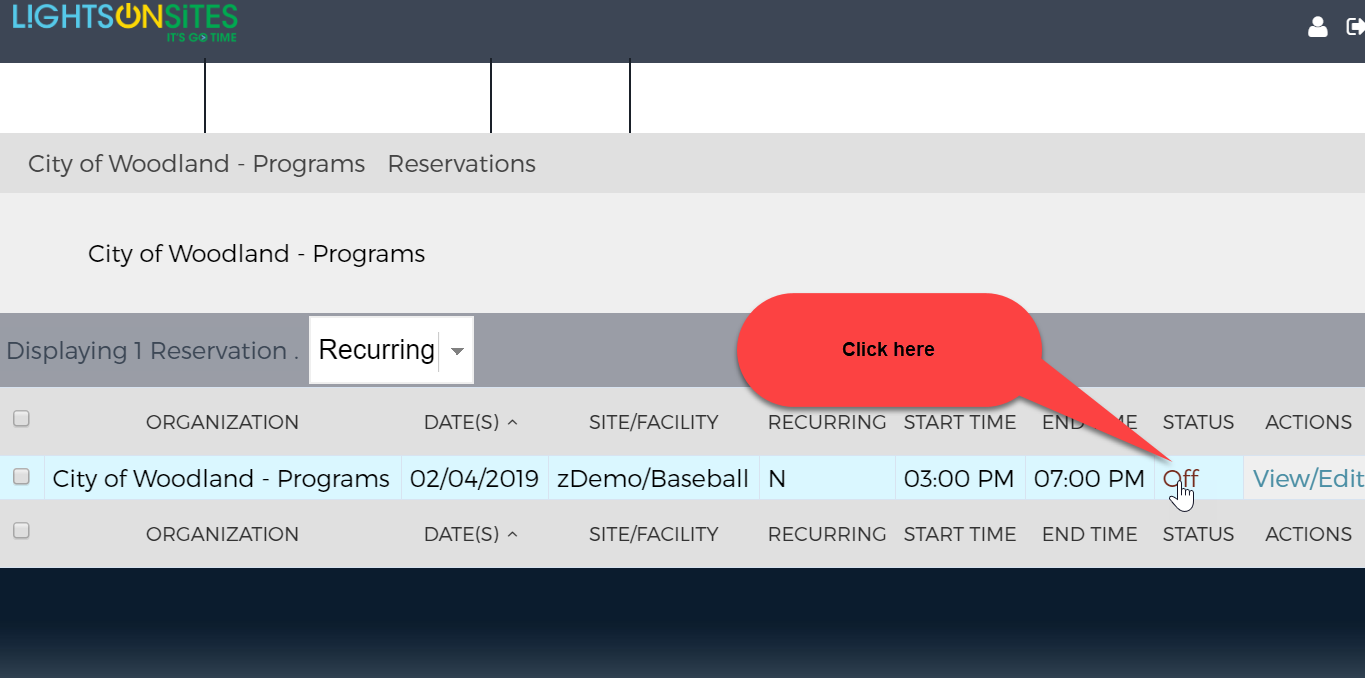
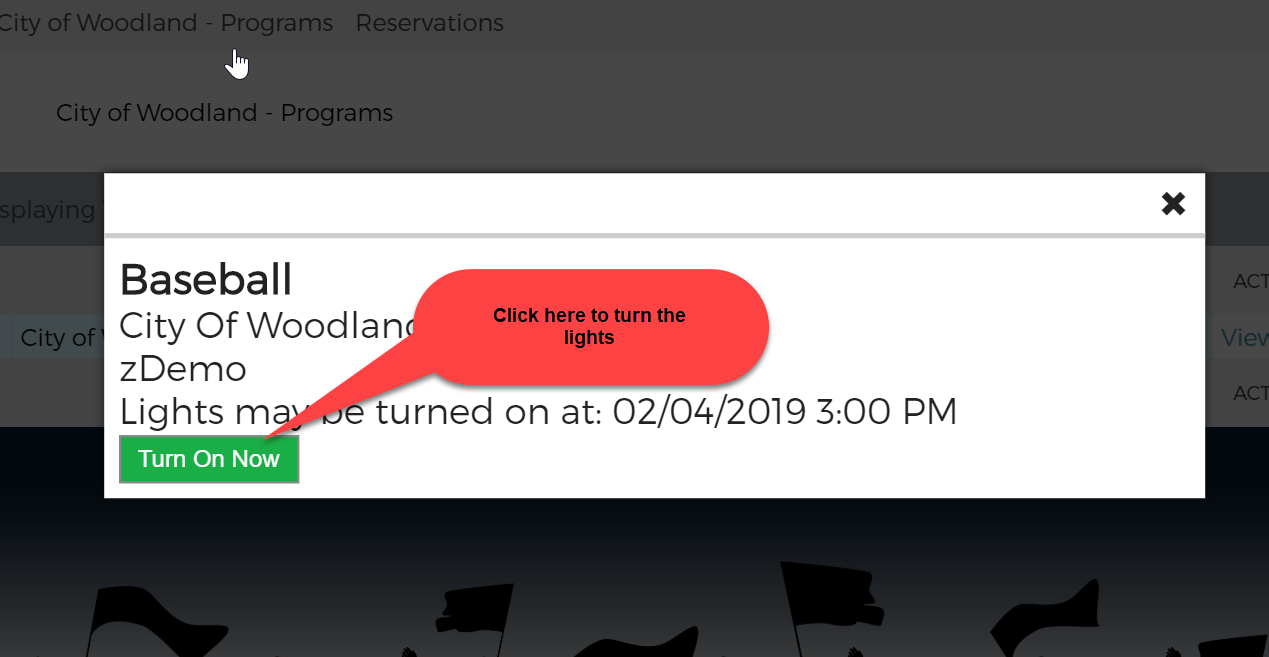
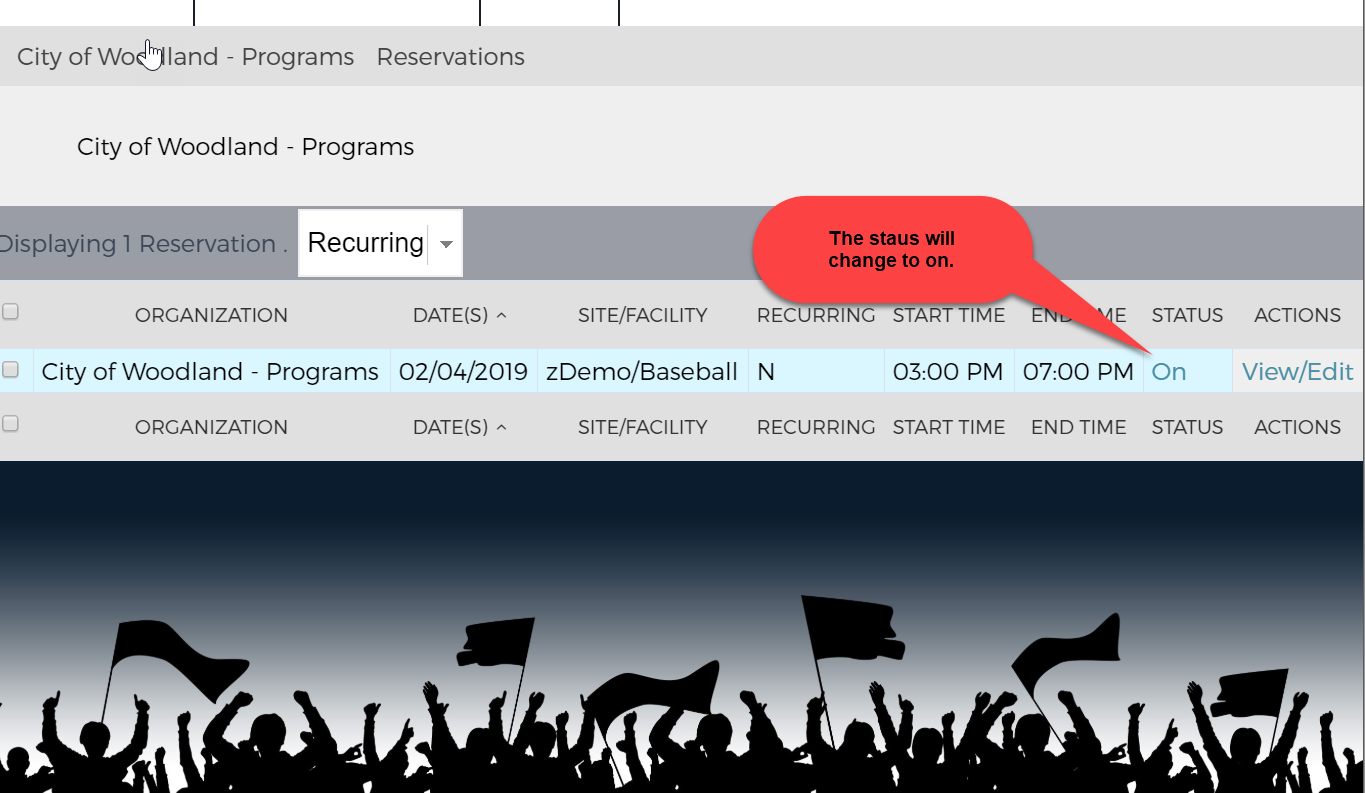
Another way and more useful way to control the lights is to come through your users screen.
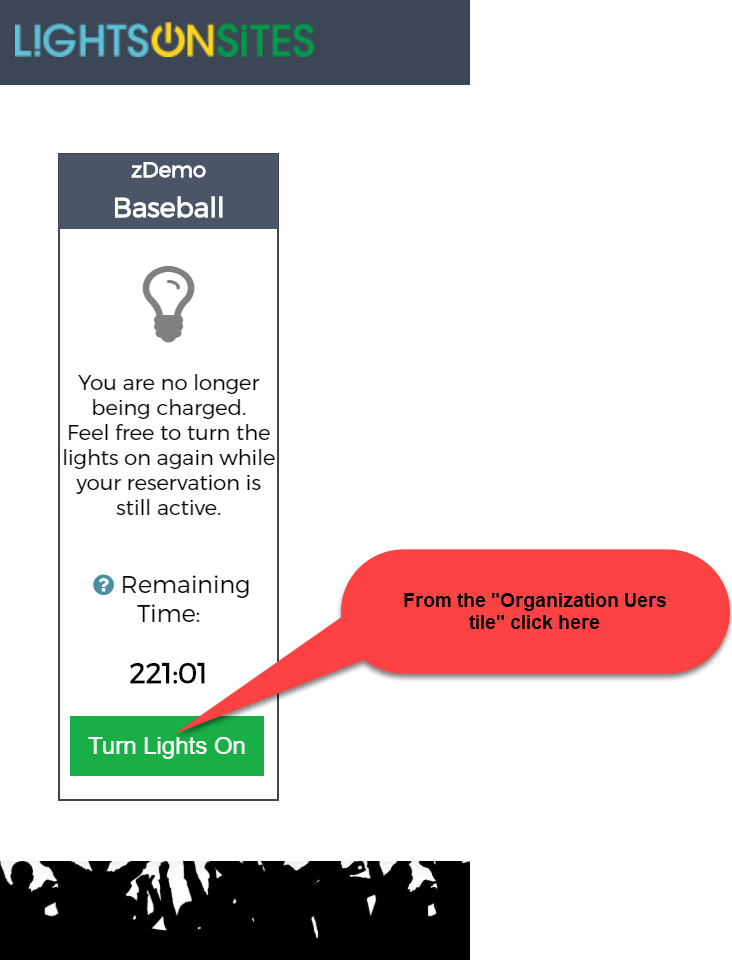
Click on your "Organization User" tile. You will see all the available reservations for that day.
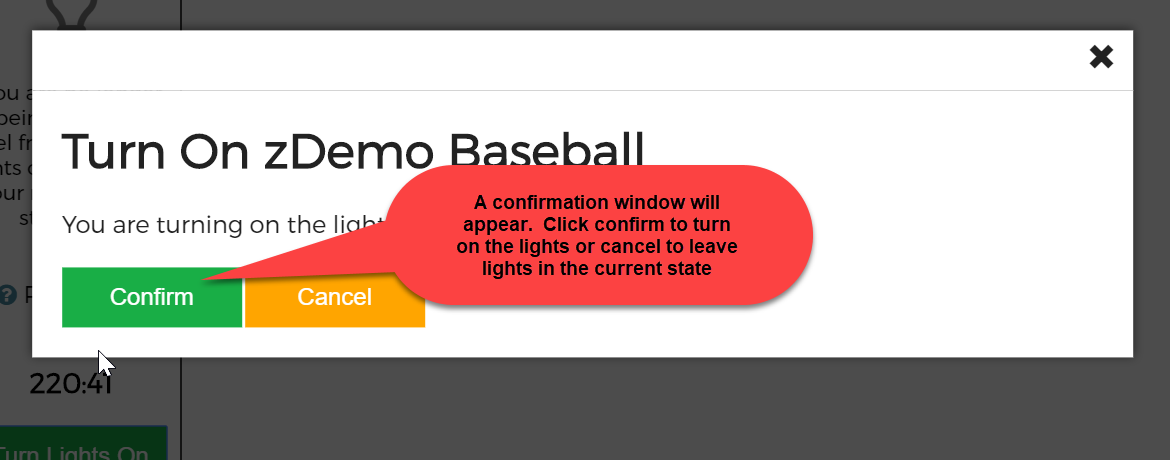
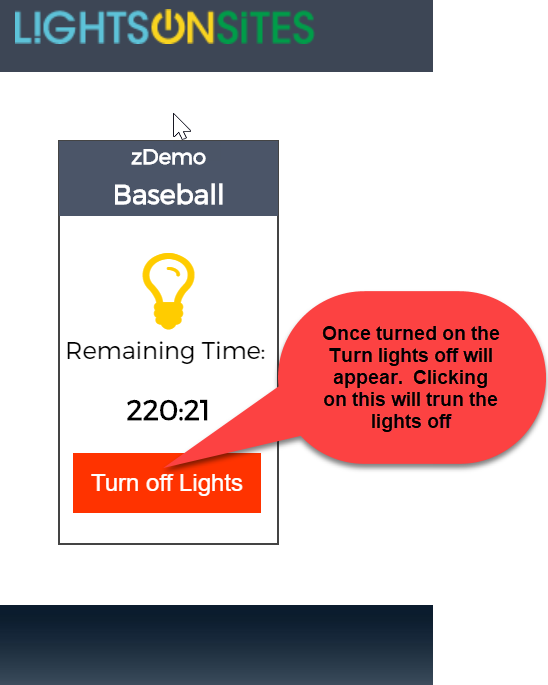
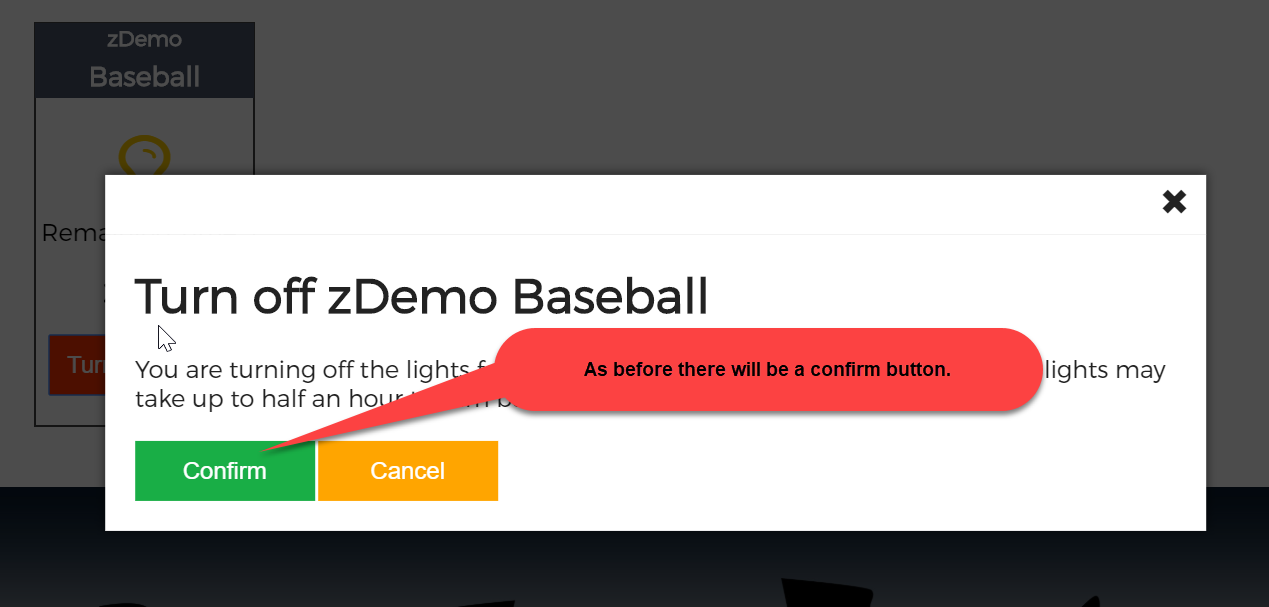
Click on "Turn Lights On" for the Schedule you would like to control. Confirm the fact you want the lights on. Follow the saem path to turn the lights off.
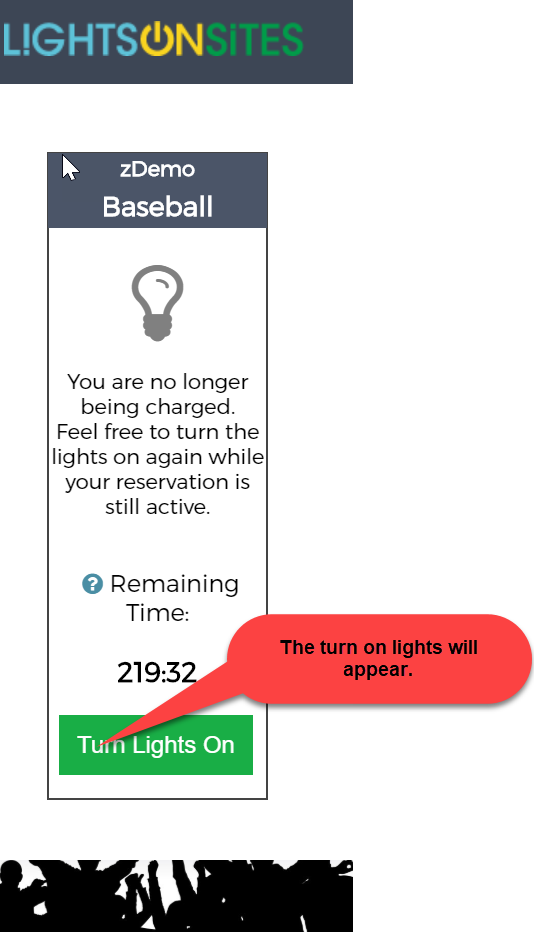
You can request Two types of control.
1. Manual on - Lights have to have user intervention to turn on. They can be turned off at any time but will turn off automatically when the schedule reaches an end.
2. Automatic on - Lights will turn on automatically at the start of the schedule. They can be turned off at any time but will turn off automatically when the schedule reaches an end.
Secondary Content